
In continuation to flying-the-perfect-dme-arc-explained, here is how to fly the perfect ILS approach.
RELATED STORY:
Flying the perfect DME Arc explained
What is an ILS?
An ILS is an Instrument Landing System and is under the category of a precision approach. The FAA has recognized ILS, PAR, and GLS approaches as precision approaches based on how they provide lateral and vertical guidance. They provide the most accurate course guidance down to a decision altitude (DA)— the lowest altitude usually 200 feet above the ground. The benefit of flying an ILS is, if you are in IFR or even LIFR conditions, you are given course guidance and collision avoidance down to the runway.
What are the components of an ILS?
A great mnemonic to remember is GLAM
G—Glide Slope
A standard glide slope is 3 degrees. The glide slope for an ILS provides an additional 1.4 degrees or 0.7 degrees on either side normally usable up to 10NM.
L—Localizer
The localizer provides course guidance down to the runway centerline. It is four times more sensitive than a VOR. The full scale for a VOR is 10 degrees and only 2.5 degrees for a localizer. Localizer antennas are located on the opposite side of the runway with a service volume of 10NM at a course width of 35 degrees on either side. With an extension of an additional 10 degrees on either side, extending another 8NM (total 18NM) from the antenna.

Photo credit to FAA FAR/AIM chapter FIG 1-1-6
A—Approach Lighting System
The approach lighting system provides pilots the ability to transition from instrument conditions to visual conditions.

Photo credit to FAA FAR/AIM chapter 2-1-1
M—Marker beacons
Marker Beacons are both aural (Morse code tones) and visual (Color flashing) compass locators that provide the pilot with cues along the approach.
(OM) Outer Marker – – – – Amber in color is located at the final approach fix (FAF)
(MM) Middle Marker _ . _ . Blue in color is located 200ft above the elevation of the touchdown zone. Middle markers are no longer required.
(IM) Inner Marker . . . . White in color is located at the decision height (DH)

How to fly it?
ILS approaches are pretty easy to get a handle on with a little practice. With a G1000 system, it’s very simple to program. The system IDs the localizer frequency for you as well as switches it over before the FAF.
In a traditional six-pack, you must tune in the Localizer frequency and ID it with the Morse code. Either overlaying the approach first with GPS or using traditional VOR feeder routes to establish yourself on the inbound course, with a traditional six pack you must verify that your localizer is tuned in and active before crossing the final approach fix. With a CDI make sure you have the right course tuned in to avoid reverse sensing.
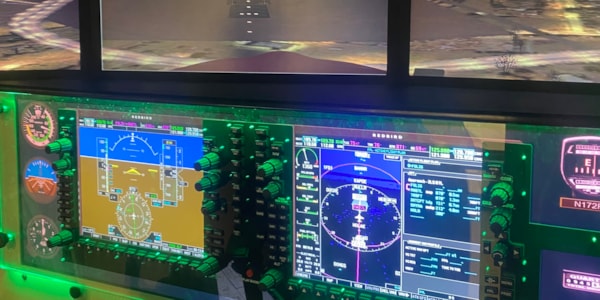
As depicted, on the G1000 your HSI will overly the lateral course and next to the altitude display you’ll have a glide slope “diamond”.

Photo credit to G1000® Integrated Flight Deck Pilot’s Guide
Everyone configures themselves for an approach differently. According to FAR 91.175, “The aircraft [must be] continuously in a position from which a descent to a landing on the intended runway can be made at a normal rate of descent using normal maneuvers”.
The method I use is, “two dot, one dot” or “two miles, one mile from FAF.” At the second dot of the glide slope (two miles away) run the landing checklist, at the first dot (one mile away) “slow and configure”. Slow and configure means to slow the aircraft down to category the airspeed and add flaps 10, unless recommended otherwise by the manufacturer. As soon as you intercept the glide slope and cross the FAF start a gradual descent down at 90kts (or configuration airspeed) at one power setting down to DA. If the diamond appears above the glide path line, you are below the glide path, and vice versa. Make small corrections accordingly.


Remember, once in ILS mode, full-scale deflection in the localizer is 2.5 degrees. If you reach half-full-scale deflection, you must initiate a go-around. The same goes for the glide path. Since it is 0.7 degrees, reaching half-full-scale deflection means you must initiate a go-around.
For a traditional six-pack, the concept works the same way only the display appears a little differently.
Recent Comments